Adding images to a subject site
Note: This article is part of the Adding and organising content collection.
The purposeful use of multimedia caters to diverse learning preferences and supports the implementation of Universal Design for Learning (UDL). Mayer’s multimedia principles suggests that, in many education contexts, students learn more deeply when presented with words and pictures, than with words alone (Clark & Mayer, 2024). Images can be used in subject content in a range of ways, including:- enhancing student understanding through visual examples,
- improving retention through visual cues (Clark & Mayer, 2024),
- demonstrating a complex topic or procedure, or
- representing complex data or information (e.g., in a graph or diagram).
Why?
When adding images, consider whether the image will enhance learning by reinforcing the intended message.
To maximise the impact of images in subject content:
- Ensure that all information is relevant and aligned. Mayer’s coherence principle suggests that learning increases when content is uncluttered and free of unnecessary detail (Clark & Mayer, 2024).
- Present words and images together, both spatially and in time, to support Mayer's contiguity principle of multimedia learning (Mayer, 2009).
How?
Image accessibility
When including images, we aim to ensure they are accessible for all users, as outlined in the Web Content Accessibility Guidelines (WCAG). These guidelines encourage us to:
- Provide an alternate means to engage with the content, such as accompanying text that conveys the same meaning, captions for images and effective alternative text.
- Use clear, high-quality images that are not pixelated.
- Avoid using colour as the sole means of conveying meaning.
- Ensure sufficient colour contrast.
Note: For more information and free tools to assist with accessible use of colour, visit Vision Australia’s Colour accessibility tools and resources.
Usage permissions
Before you have determined that an image is a purposeful addition to your content, it's important to make sure you have permission to use the desired image in your subject site.
Note: For more information on sourcing images and copyright, visit the UOW Copyright guidance for staff page, or contact copyright@uow.edu.au.
Adding images to your site
You can add an image anywhere the text editor is available by following these instructions:
- Ensure Edit mode is on.

- Navigate to where you would like to add an image in your subject site.
- In the text editor, click the Insert or edit image button.

- From the Image properties popup, click the Browse repositories... button. This will open the File picker.
Note: Images may be uploaded from several sources, but the most straightforward method is to upload a file from your computer, which is outlined below. - Select the Upload a file option from the menu in the File picker, then click the Choose File button that appears.
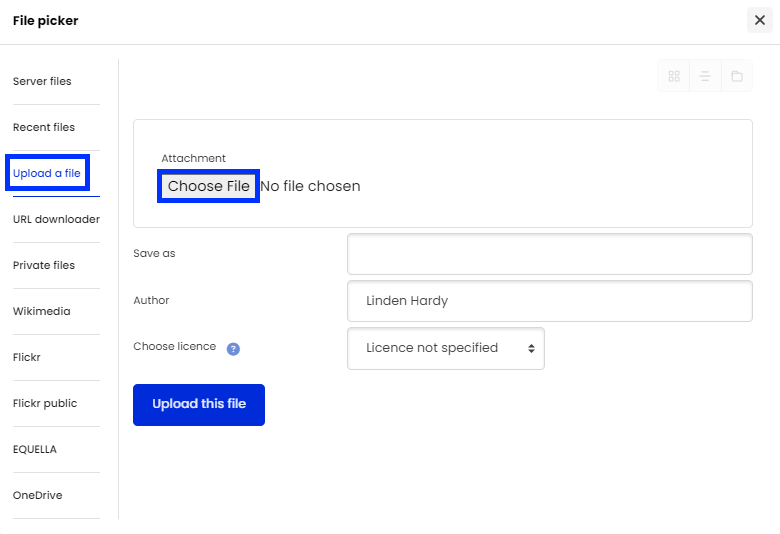
- This will display a file explorer popup where you can navigate to and select the relevant image from your computer.
- Once you have selected the image, enter a file name into the Save as text box.
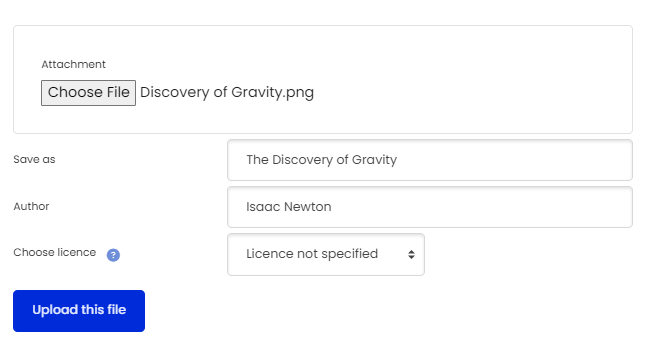
Note: The Author and Choose license (copyright) information fields should be updated as required. - When finished, click the Upload this file button.
- This will return you to the Image properties popup, where you can enter the following information:
- An alternative text description for the image in the Describe this image for someone who cannot see it text box.
Note: For guidance, please refer to the Writing effective alternative text article. - Leave auto-sized enabled, unless you want to set specific dimensions for the image. By default, images will automatically resize depending on the viewer's screen.
- Select left-aligned from the Alignment dropdown menu.
Note: Wherever possible, content should be left-aligned. Content that is right or centre-aligned can be disorientating, particularly for viewers who rely on digital magnification to view content.
- An alternative text description for the image in the Describe this image for someone who cannot see it text box.
- Once this information has been provided, click the Save image button.
Related Information
- Moodle Documentation – Images | External resource
- Richard E. Mayer’s Multimedia Learning (eBook) | UOW Library
- Web Content Accessibility Guidelines (WGAG 3.0) | Web Accessibility Initiative
- Colour accessibility tools and resources | Vision Australia
- Brickfield Education Labs - Image accessibility tips | External resource
References
Clark, R.C., & Mayer, R.E. (2024). E-Learning and the Science of Instruction: Proven Guidelines for Consumers and Designers of Multimedia Learning (5th ed.). John Wiley & Sons, Inc.
Mayer, R.E. (2021). Multimedia Learning (3rd ed.). Cambridge University Press.
 Assistant
